Installing a Pro Design killswitch

450Riot

Well-Known Member
Joined
Apr 24, 2012
Location
Saskatoon, Saskatchewan
Went to the garage tonight to prep for the install and got a little confused.

04 Kicker. I'm taking the LH Switch completely off the bars and doing a headlight wiring delete.

I separated the black/white and the proper green wire from the rest. I took the headlight wiring apart to find a solid black, blue, brown and green wires. So to test my logical thought that if I connect the black/white and green from the killswitch's button it should turn over and fire. So i connected them and gave it a kick and nothing. I tried leaving them disconnected and nothing. Neither of them should need to be grounded right? There's no ground at the bar...

What am I missing here?

Searched on this forum and the org and a couple others but they all talk about ER's or leaving the cluster on the bars or connecting a killswitch to the key instead. I want to get rid of the LH Switch on the bars and put the Killswitch there.

Thanks.
 
Just went out and tested continuity between the green and black/white being twisted together and being grounded to frame and there is continuity. Read in the service manual that when the k/s is to the not running position it should be grounded. So i twisted the two together and didnt ground them thinking it should fire, but it won't.
 
Or... What I did. Same as the Proarmor kit they sell but I made it out of parts I had in the tool box.
Killswitch1-1.jpg

bike001-1.jpg
 
I read your post's on other forums about going straight to the ignition coil. I wanna use the red and black/white and delete the k/s on the bars. It's a normally open circuit so shouldn't I solder the green and black/white together and use the tether as the ground?
 
So after work today I came out and separated the green and black n white as the service manual shows that when they are connected the bike will shut off.

Gave it one kick and she fired up. Thats what I thought should have happened last night but it just wouldn't fire. Everything was in run mode last night so i don't know if I flooded it or what.

Probably have some fuel in the crank case now. Time to change oil.

I'll get a pic once my hydro clutch shows up and the tether is installed. Should be a nice clean look.
 
Some deals fell through on the clutch but I got the pro design done. Need a new basket worse than a hydraulic clutch and I'm in a money bind so we'll see what happens this winter. Might be an electrician by spring and actually have some money!
 
My guy just showed up today with my Pro Taper Hotstart lever. They are really nice for the price you pay $10. It is a half clamp so it mounts up to your clutch lever's mount. Hopefully all of this clears my Pro Design since I have Pro Taper Travis Pastrana FMX Dirtbike bars on it! Hahaha
 
Soooo now I'm pissed.

Got my Pro Taper hotstart lever today. Looks like it'd only match up to a Pro Taper lever as well.

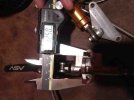
Heres how it works.. it's a half clamp with a pivoting hotstart lever attached to the bottom. Everyone knows how a half clamp works so I'm sure you can visualize the rest.

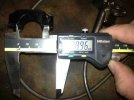
The center to center on the mounting holes is about 4mm off from the OEM lever's c-c.

The only fix I can think of is drilling the threaded hole in my clutch half out so that I could put a zip tie through.

I could also try tapping out my clutches half clamp a bit and doing the same to the PT Hotstart but theres not much material there and it'd definitely break within one season. I don't wanna buy the Pro Taper lever to go with it because I'm saving up for the Streamline Hydraulic Clutch.

What I'm hoping someone can do for me is measure their Streamline Hydro's center to center with a digital caliper and post it. That way I'll know if this hotstart is gonna work for it or not.

Thanks!
 
Back
Top